Guides › Share & use your skin
How to turn a skin PNG into a .mcpack for Bedrock
Upload any Minecraft skin PNG, choose Bedrock Edition and the right arms, and download a .mcpack that Minecraft Bedrock imports with one tap — free, in your browser.
3 min read · 3 steps · Beginner
Step 1: Upload the PNG
Open Upload / Export (the Import skin button in the editor's top bar, or Import on a phone). In 1 · Upload, press Upload, drop the PNG on the box or paste it with Ctrl + V.
Any Minecraft skin PNG works: 64×64, old 64×32 skins (they open in the 64×64 layout) and HD skins up to 512×512. The skin turns in 3D so you can check it.
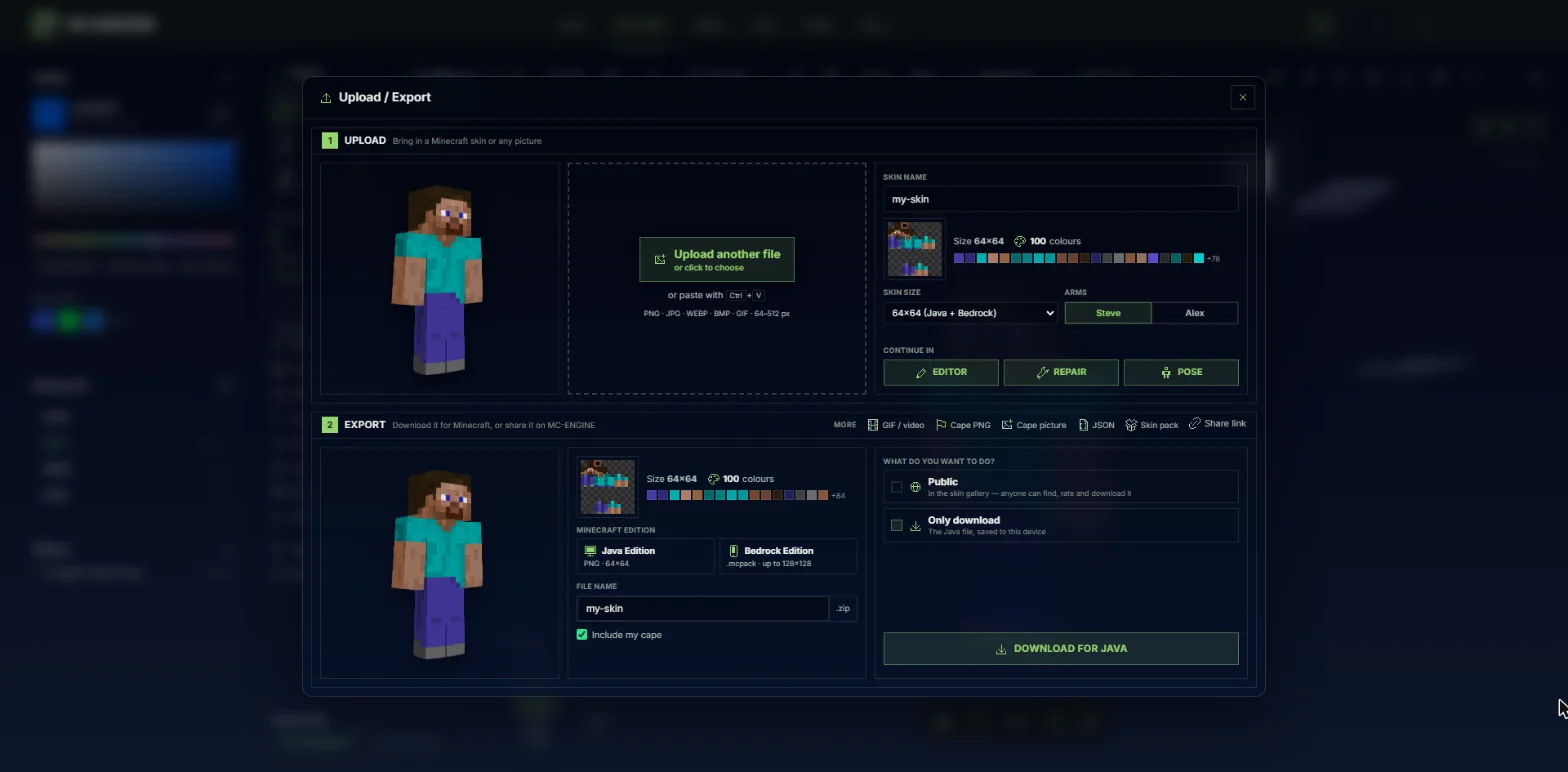
- Upload: drop or choose the skin PNG.
Step 2: Pick the arms and Bedrock
Set Arms to Steve (4-pixel arms) or Alex (3-pixel arms) — the same arms the skin was painted for. The .mcpack remembers this, so Minecraft uses the right model.
In 2 · Export, choose Bedrock Edition, check the file name (it becomes the skin's name in Minecraft), keep Only download and press Download. You get a .mcpack file.
HD skins bigger than 128×128 are saved at 128×128 inside the pack, the biggest size Bedrock skin packs take.
- Bedrock Edition and Download.
Step 3: Open the .mcpack in Minecraft
Windows: double-click the .mcpack. Minecraft opens and shows that the import started and then worked.
Android: open the file from your Downloads and choose Minecraft when your phone asks which app to use.
iPhone and iPad: open the file in the Files app, press Share and pick Minecraft.
Then in Minecraft go to Dressing Room → Classic skins, find your pack and pick the skin.
Tip: Xbox, PlayStation and Switch can't import skin files. On those, only skins from the Marketplace and Dressing Room work.
More guides
- How to put a custom skin in Minecraft Java & Bedrock
- Wear HD skins and moving capes in Minecraft (MC-ENGINE Skins mod)
- Moving GIF cape in Minecraft: from the website to your game
- How to make a Bedrock skin pack with several skins
- How to make a Minecraft skin GIF or video (4 ways)
- Share skins with the community
- Publish skins and manage My skins
- Your profile: photo, links, badges and security
- Events: skin contests — enter, vote and win
- Favourites, collections, notifications, reports and the weekly leaderboard
- Minecraft capes and elytra: browse, download, wear and upload
Updated 2026-11-09 · by the MC-ENGINE team
Not an official Minecraft product. Not approved by or associated with Mojang or Microsoft.