Guides › Getting started
How to use Find a button (search every tool)
Every tool page has a search: type what you want to do, read a short how-to, and press Show me to light up the real button. Works in the skin editor, cape editor, Repair, Photo to Skin and Pose, on PC and phone.
3 min read · 5 steps · Beginner
Step 1: Where the search is
Every tool page has its own Find a button search. It only lists the buttons of the page you are on.
Skin editor (PC): press the magnifier in the top bar, right after Import / Export. The search box opens above the 3D model.
Repair and Photo to Skin (PC): the Find a button… box is in the top bar, next to How it works. One search covers both tabs.
Pose (PC): the Find a button… box is at the right of the top bar, next to How it works.
Cape editor (PC): the Find a button… box is at the right end of the top bar, before Reset and ?.
On a phone: tap the magnifier at the top of the screen. In the skin editor, Repair, Photo to Skin and Pose it is next to Import; in the cape editor it is next to the bell. The search bar opens under the top bar; tap anywhere else to close it.
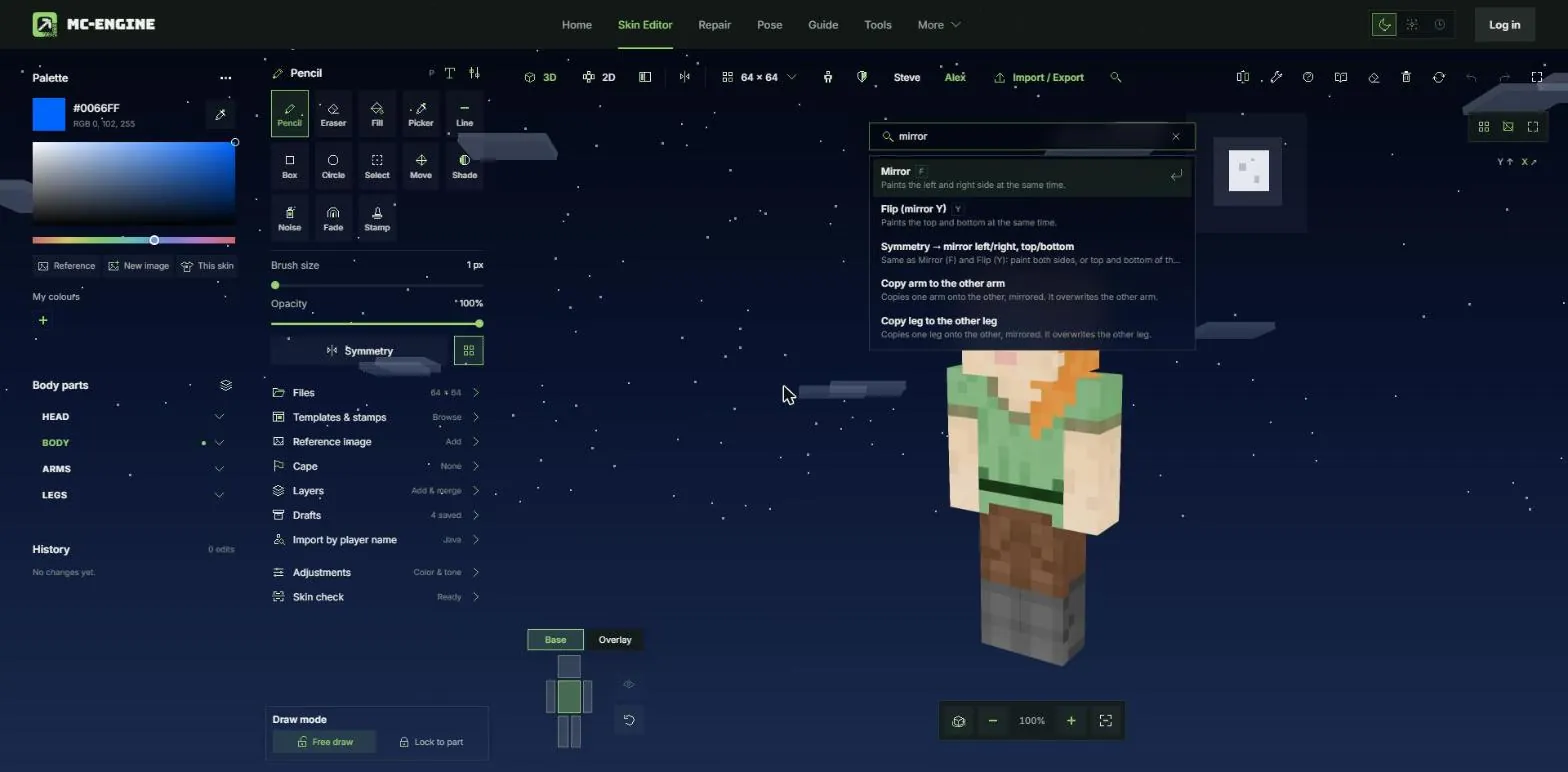
- The magnifier opens the search (skin editor).
- Type a tool or what you want to do.
- The results: each button with one line about it.
Step 2: Type what you want to do
You don’t need the exact name. Type the tool (pencil, eraser, fill) or what you want to do: mirror, hat, undo, hd, gif, elytra, remove background, start over.
Results show as you type. Use the arrow keys and Enter, or click / tap a result. Keys like P or Ctrl Z show next to a tool’s name.
Tip: Can’t think of a word? Click the empty box: it lists the page’s buttons to scroll through.
Step 3: Read the how-to, then Show me
Picking a result opens a small card: what the button does and how to use it, in one or two steps.
Show me finds the real button on the page and lights it up, with a tip next to it. If it sits in a closed panel, a tab or a menu (for example the Photo to Skin tab in Repair, or the Studio sheet on a phone), it opens that first.
Full guide opens the part of the step-by-step guide that explains it, in a new tab, so your work stays where it is.
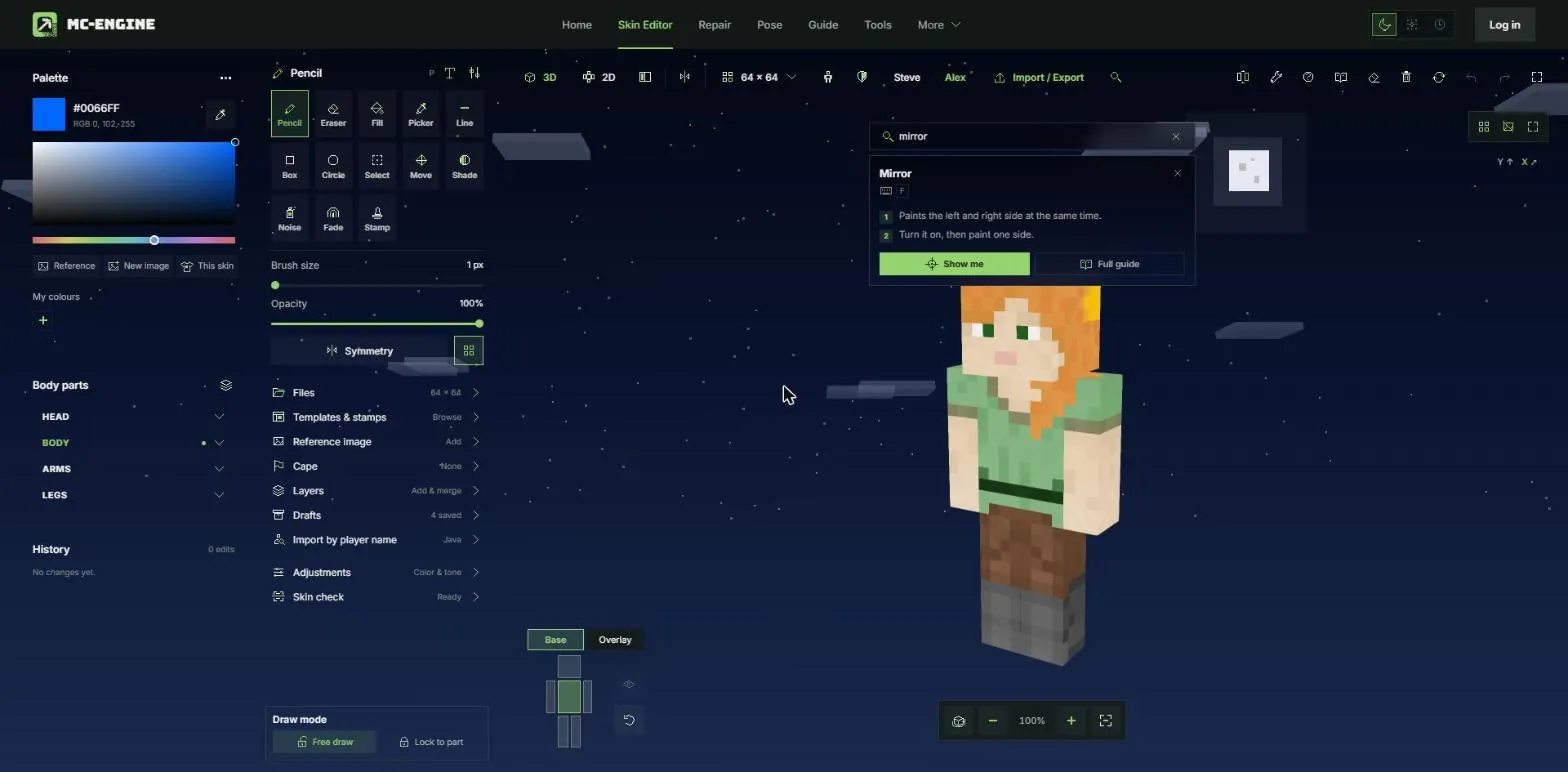
- Show me: lights up the real button.
- Full guide: the guide part about it (new tab).
Step 4: The button lights up
The screen dims around the button and a green frame pulses on it, with a tip that says what it does. You can use the button straight away.
Click or tap anywhere, or press Esc, to close the tip. It also closes by itself after a few seconds.
Some buttons only show in some views (for example only in 2D, or only once a cape exists). Then the card says it isn’t on screen right now, and Full guide explains when it shows.
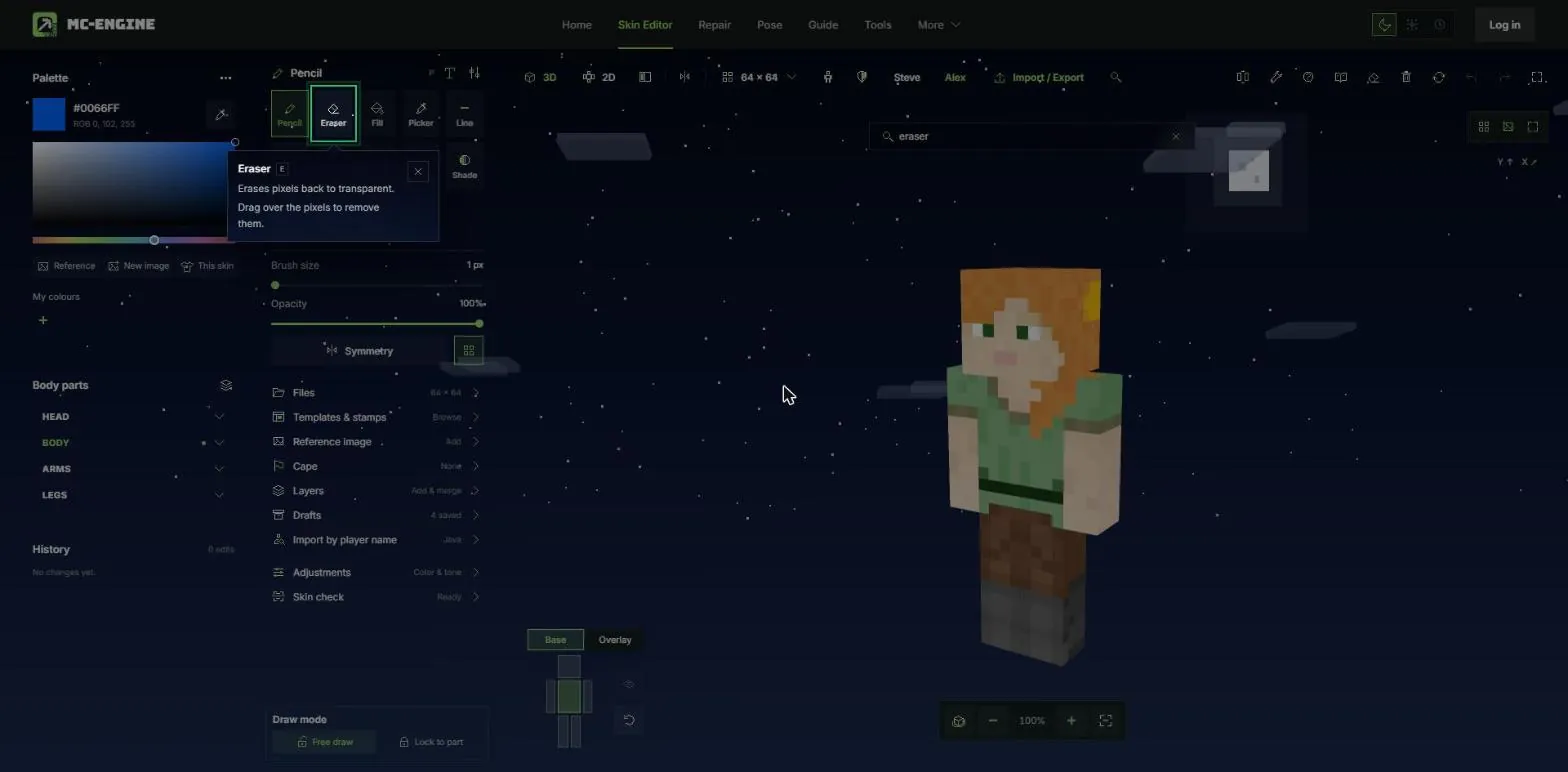
- The button, framed in green.
- The tip: what it does and how to use it.
Step 5: On a phone
Tap the magnifier at the top. The search bar opens under the top bar with the page’s buttons listed; type to narrow it down.
Tap a result, then Show me. The bar closes and the button lights up. Tap anywhere outside the search to close it without picking anything.
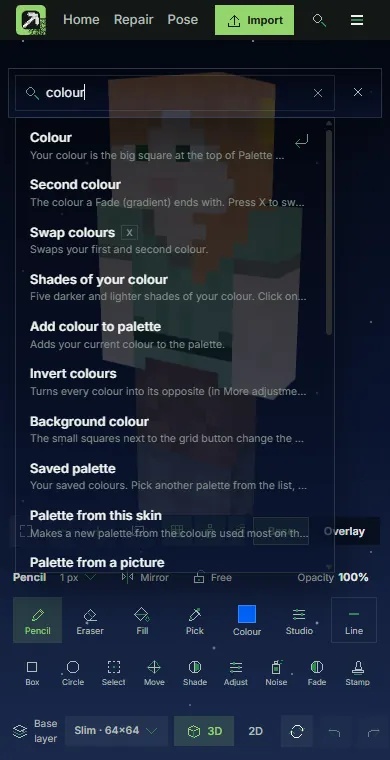
Good words to try
| Option | Key | What it does |
|---|---|---|
| Skin editor | pencil, mirror, hat, layers, undo, template, stamp, hd, export, reset | |
| Cape editor | pencil, fill, colour, elytra, gif, size, download, bedrock, skin pack, reset | |
| Repair | upload, face, confirm, locked, fit, live link, complete, reset | |
| Photo to Skin | photo, crop, rotate, colour, pixel look, remove background, sides, reset | |
| Pose | pose, wave, custom pose, background, screenshot, capture me, record, gif |
More guides
Updated 2026-11-13 · by the MC-ENGINE team
Not an official Minecraft product. Not approved by or associated with Mojang or Microsoft.